Thursday, July 18, 2013

Tomates A La Provencale

I decided to borrow my sister’s Julia Child’s cookbook and take a look at a few of her side dishes. Some may think her recipes are tough, but they aren't too difficult, it just seems that way because it’s a lot of steps to follow. Be patient, it’s wonderful at the finish line!

Since I’m doing Weight Watchers, I decided to try one of her side dishes that has a vegetable in it. Summers in New Jersey, mean Jersey tomatoes, and they are the best! So when I scanned through her recipes and came across this, my decision was made. I actually used shallots and green onions and added some panko to the bread crumbs for more of a crunch. Her recipe asks you to roast them on third level oven rack at 400 for 15 minutes, but I let them roast in the oven for about 45 minutes at 350* in the middle then moved to the top rack for ten minutes and they were so juicy and browned on top. This is the perfect (and healthy) vegetable dish to accompany your summer dinners! Bon Appetite!

Tomates A La Provencale

  • (8) firm, ripe, red tomatoes (about 3 inches in diameter)
  • Salt and Pepper
  • 1-2 cloves mashed garlic
  • 3 TB minced shallots or green onions (I used both)
  • 1/8 TSP Thyme
  • 1/4 TSP salt
  • Big pinch of pepper
  • 1/4 cup olive oil
  • 1/2 bread crumbs (I used a mixture of regular bread crumbs and panko for a bigger crunch)
  • A shallow, oiled roasting pan just large enough to hold the tomatoes easily in one layer

Directions:

  1. Preheat oven to 400 degrees
  2. Remove the stems, and cut the tomatoes in half cross wise (the equator of the tomato). Gently press out the juice and seeds. Sprinkle the halves lightly with salt and pepper.
  3. Blend all the ingredients except bread crumbs and oil together. Correct seasoning if needed. Fill each tomato half with a spoonful or two of the mixture. Sprinkle with a few drops of the olive oil. Arrange the tomatoes in the roasting pan; do not crowd them.*may be prepared ahead to this point*
  4. Shortly before you are ready to serve, place them in the upper third of the preheated oven and bake for 15-20 minutes, until the tomatoes are cooked through and the mixture has golden browned on the top. **I cooked these at 350* for about 45 minutes on the middle rack, and placed on upper rack for last 10 minutes and they were great!

Sunday, March 3, 2013

Healthy Make ahead Breakfast Sammies TO GO

Have you ever rushed out the door  during the week en route to work and skipped breakfast? And as your driving you pass Wawa and think to stop for their sausage egg and cheese sizzlie because your stomach is grumbling? Or as your ordering your morning Dunkin Donuts coffee your salvating at the pictures of the donuts, muffins, and Big N Toasted Texas toast breakfast sandwich? Been there, done that.

Problem now solved!

Last week, I was on Pinterest and stumbled across Undressed Skeleton's blog where she makes ready to go homemade egg sandwhiches which are A. healthy and B. inexpensive. The only con, is that you need to put some time aside on the weekend to make, bake, and assemble. Well, I attempted it this weekend and it was super simple and super delicious! I watched TV as I assembled these bad boys and there are soooooo good! I used a few different brands and tried a few different cheeses to spice it up a little bit to! And now I have (5) sammies sitting in my freezer as we speak ready for my early morning rush to work! Bring it on Monday!

Total time making/baking/assembling: 30 minutes or a full episode of Diners, Drive Ins, and Dives
Total cost per sammie: $1.70
Makes 6 servings ( 1 sammie per serving)
About 260 calories, 5 g of fat, 31 g Carbs, 5 g fiber, 22 g protein

Ingredients:
  • (5) egg whites and (1) whole egg
  • (6) Thomas English Muffins (high fiber)
  • Turkey Bacon
  • 6 slices low fat cheese ( I used sharp cheddar, provolone, and mozzarella)
  • tomato, sliced and diced
  • salt and pepper
  • dried oregano
  • dried basil
*get creative and try diced bell peppers, spinach, onions., etc... 

Directions

  1. Preheat oven to 350, and line cookie sheet with foil and spray with nonstick spray. Lay out 6 slices of turkey bacon and put in oven on middle rack for 6 minutes
  2. scramble the eggs, add tomatoes, oregano/basil, salt and pepper and pour into 6 greased muffin tin cups
  3. when the oven dings after 6 minutes, move the bacon one level down and slide muffin tray on to middle rack
  4. plug in your panini maker or grill and slice your english muffins
  5. slice your cheese and place on bottom english muffin.
  6. When the oven dings again, remove the bacon, place on paper towels to soak up extra grease and leave eggs in for 3 more minutes
  7. once bacon is cool to handle, cut each slice in half and place two pieces on top of the cheese.
  8. after 3 minutes take out the eggs and let cool. Once cool enough to handle, take a spoon and take each egg cup out and put on top half of english muffin. 
  9. place the sammies on the panini  grill and press down so egg is the size of the english muffin and let grill for 3-4 minutes or until golden
  10. remove from panini maker and cool
  11. place on wax paper ( or place in ziplock bags), wrap them up, and assemble with tape or stickers (I had some Trader Joe stickers in my drawers, pick them up while your at the store, they are free too!) which ever you have handy and place in your freezer for the work week ahead.
  12. when your ready to eat, place in microwave for 2-3 minutes ( depends on your your microwave), grab some fruit and your ready to start the day with high protein, fruits, and veggies!

Wednesday, February 27, 2013

Shrimp and Sausage Cioppino


My girlfriend, D’yani , gave me Weeknights with Giada cookbook last year for my birthday and it’s my absolute favorite! She has a Shrimp and Sausage Cioppino recipe that I used as a base to start and then I tweaked  and added some things in my first attempt to this beautiful one pot dish. My hubby said it was an absolute treat for him when he walked in the door and knew something special was on the stove, so enjoy!

Ingredients
  • 1/4 cup extra-virgin olive oil
  • 4 cloves garlic, peeled and smashed
  • 2 large or 4 small shallots, chopped
  • 1/2 teaspoon kosher salt, plus 1/2 teaspoon
  • 1/4 teaspoon freshly ground black pepper, plus 1/4 teaspoon
  • 1 pound sweet Italian turkey sausage links, casings removed (can use spicy/hot sausage too)
  • 2 cups white wine, such as Pinot Grigio (I used Yellowtail Pinot Grigio)
  • 1/4 cup tomato paste
  • 3 cups low-sodium chicken broth
  • 1 bay leaf
  • 1 pound large shrimp, peeled and deveined ( I used frozen)
  • 1 dozen fresh little neck clams
  • 1 14oz can diced tomatoes (I used Hunt’s diced with oregano and garlic)
  • 1 cup fresh basil leaves, chopped
  • 1 tablespoon chopped fresh thyme leaves

Additional variations:
Crusty sourdough bread
Cup of rice


Directions
  1. In a separate medium sauce pan, cook your rice and set aside.
  2. In a Dutch oven or large saucepan, heat the oil over medium-high heat. Add the shallots, garlic, 1/2 teaspoon salt, and 1/4 teaspoon pepper. Cook, stirring occasionally, until the vegetables are slightly softened, about 4 minutes.
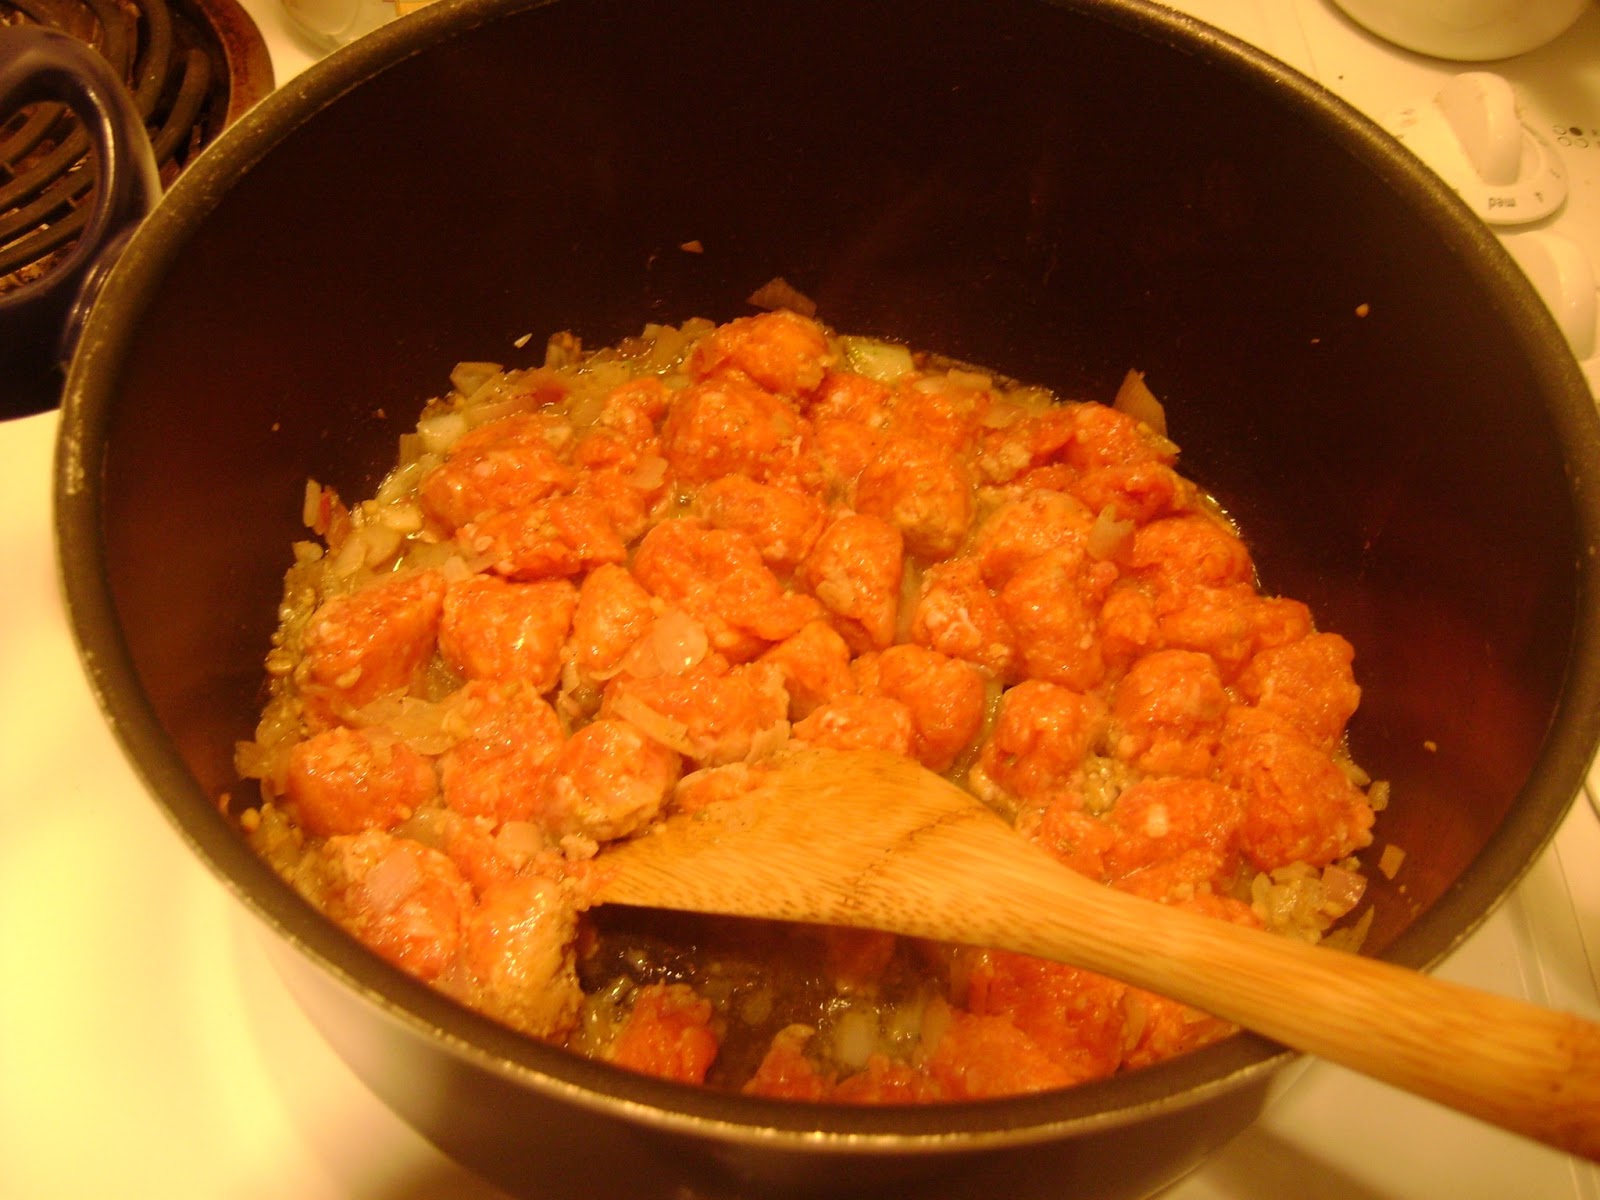
  3. Add the sausage and break into 1/2-inch pieces with a wooden spoon. Cook until brown, about 5 minutes.
  4. Turn up the heat and add the wine and scrape up the brown bits that cling to the bottom of the pan with a wooden spoon. Stir in the tomato paste, chicken broth, and bay leaf. Bring to a simmer, cover, and cook for 10 minutes.
  5. Uncover the pan and add the clams, basil, and thyme. Wait for them to pop and then drop your shrimp in. Simmer, uncovered, until the shrimp are pink and cooked through, about 4 minutes.
  6. Remove the bay leaf and discard. Season with the remaining 1/2 teaspoon salt and 1/4 teaspoon pepper.
  7. Drop a ¼ cup of rice into your soup bowls and then ladle the Cioppino on top and serve with crusty bread.


Wednesday, December 12, 2012

Huge Reese’s Peanut Butter Cookies


I can’t believe Turkey day has come and gone, and now it’s already December 12th? Where has the time gone? It’s just crazy-nonetheless,  I want to talk about my Thanksgiving cookies that I made and brought to my parents house in Virginia for Thanksgiving which featured me and my hubby’s favorite candy, Reese’s Peanut butter cups!
These were super simple using my handy dandy kitchen aid mixer, the hardest part was keeping my hubby from eating the Reese’s candies that were all unwrapped! I made a variation of sizes with these and were super fun to share and eat with our family. Couple these bad boys with some Paula Deen Ooey Gooey Butter Cookies and everyone will be smacking their sugary lips applauding your baking skills!

Over the Top Reese’s Peanut Butter Cookies
·         3/4 cup unsalted butter, softened
·         1 cup sugar
·         1 cup brown sugar
·         1 cup peanut butter (I used JIF creamy)
·         2 large eggs
·         2 tsp vanilla
·         1 tsp baking soda
·         1/2 tsp salt
·         2  1/2 cups flour
·         1  1/2 cup milk chocolate chips
·         32 mini Reese’s peanut butter cups, each cut into 4 pieces

  1. Mix the ingredients down to the vanilla.  Add soda, salt, and flour.  Fold in chocolate chips.
  2. Using an ice cream scoop, scoop dough (these are big cookies).  Place 6 scoops of dough on ungreased cookie sheet.  Use your hand and slightly flatten each scoop of dough.  Cook for 12 minutes at 350.**
  3. Remove cookies from oven and lightly press 8 cut up pieces of the Reese’s peanut butter cups over the top of each cookie. Cool on baking sheet 2 minutes before placing on cooling rack.  Makes 18 big cookies.
4.       Variation: you can also use mini or regular M&M pieces or any other chocolate favorite candy of yours in place of the Reese’s pieces.
**if you don’t want big cookies, just use a melon baller and make smaller cookies and then you will have more to nibble on and share. Up to you!

Wednesday, October 3, 2012

Mason Jar Salsa


If I was deserted on an island and I could have one snack to eat for the rest of my life, it would be chips and salsa (and queso too if I can!). I just really love salsa and have a few restaurant favorites in which I can eat the whole basket of chips and lick that salsa bowl clean- hey I’m just being honest! Some of those favorites are from On The Border, Don Pablo's, Los Amigos and Chili's. I like a smoother consistency more than chunky but you can control that via the food processor to your likings.

This recipe made enough to last about two weeks in the fridge tightly sealed. I also used this salsa to top on chicken and quesadillas and its perfect to have handy when it's game time on Sunday's.. The dishes are limitless to what else you can add this with! So get to the kitchen and start salsa'ing!

What You Need:
5-6 Roma tomatoes, chopped (I actually used the Cento canned ones as my grocer was out of Roma’s)
1 Small onion, chopped
1/2 Cup fresh cilantro, chopped
1 Serrano, seeded and minced
1 JalapeƱo chile, seeded and minced
2 Cloves garlic, minced
2 Tbsp. freshly squeezed lime juice
1 tbsp of EVOO
Salt and pepper to taste.
*mason jar

Directions
  • Heat pan over medium, and add the EVOO, garlic and onion and stir for 2-3 minutes
  • Add the chilies, stir for a 1-2 minutes
  • Then add the tomatoes and use a potato masher to crush them a bit
  • Season with salt and pepper and let simmer for about 5 minutes
  • Turn off the stove and pour mixture into the food processor, add your cilantro and lime juice, and pulse a few times until you get the consistency you like!
  • Taste test and add S&P, garlic, cilantro, etc as needed for your taste buds then pour into your mason jar, close and put into your fridge for a bit while you arrange chips in a bowl and salivate waiting for those beautiful ingredients to marry together.

I’d suggest you let it sit for at least an hour, but preferably over night. The longer the better, as the flavors get a chance to dance together over time.

Friday, August 3, 2012

Thin Crust Shrimp Scampi Pizza


If you like thin crust pizza and shrimp scampi, you'll love it even more when using Lavash flatbread to make a pizza! It takes only minutes to prepare and the edges become super crispy. I read this recipe on Pinterest through Care’s Kitchen blog and wasn’t even sure what Lavash was, but thought I’d give it a try since I saw Skinnytaste also using it in a flatbread pizza recipe.

Lavash is a Middle Eastern flatbread, thinner than a pita and not as doughy as Pillsbury pizza dough. You usually find in the deli section of your supermarket or you can find it at Trader Joe's for $2.29 for (6) if you have one nearby! You can use these for sandwich wraps too!

I changed some things from Care’s Kitchen and added some spinach and more garlic. I also used Trader Joe’s packaged pesto but feel free to make your own as well!

I strongly encourage you to use a pizza stone if you have one (I use the Mario Batale Pizza stone from Crate and Barrel-best wedding gift ever, thanks Lindsay Lee!), but be careful when taking that big stone out when it’s hot, I received an oven wound and burnt my thumb by accident, owwwwwwww!
 Ingredients: 
  • Lavash Flat Bread
  • 4 cloves fresh Garlic, minced
  • 2 tbsp Extra Virgin Olive oil
  • 1 Package of frozen, peeled, deveined, tails taken off TJ’s medium shrimp (or use fresh of course if you can)
  • Salt and Pepper
  • 2 tablespoon Flat leaf Italian parsley
  • 2 tablespoon chopped spinach
  • Prepared Pesto
  • 8 oz part skim Ricotta Cheese
  • Grated Parmesan Cheese
  • Red Pepper flakes (optional)

 To Prepare Pesto/Ricotta Mixture: 
Take Prepared pesto and Ricotta Cheese and mix together in a bowl until well combined and tastes delicious! Set aside.

To Prepare the Shrimp:
  1. Take thawed shrimp and marinate in EVOO, crushed garlic, red pepper flakes if you choose, and a touch of salt and pepper for at least 10 minutes.
  2. Heat a pan over medium-high heat.
  3. Add shrimp with garlic/EVOO to hot pan and flash cook about 3 minutes (the shrimp do not have to be cooked all the way as they will finish cooking in the oven.)
  4. Remove from the pan and once cool enough, chop up the shrimp, set aside

 Time to make the pizza:
I know this may seem like it's a lot of instructions, but it's very simple, and after you make it once, you'll know what to do and you can use the Lavash bread with any type of pizza type that you love, ie: margherita, prosciutto, four cheese, pepperoni, etc...
Right out of the oven
  1. Place a pizza stone or cookie sheet in the middle of your oven and preheat to 425.
  2. Once it's reached temperature, place (1) piece of Lavash Flat Bread onto the stone or sheet and cook for 2 minutes.Keep in mind that when the Lavash is cooked, it has a chewy but delicate cracker consistency, so when spreading your toppings just be sure not to press too hard or it can crack – that being  said - it can handle as many toppings as you choose! 
  3. Carefully remove the Lavash Flat Bread from the oven and place on a flat surface. (watch your thumbs people!)
  4. Take a garlic clove that's been cut in half and gently rub one side of the bread with the exposed fresh garlic - all over the bread. 
  5. Brush entire bread with thin coating of EVOO
  6. Spread your pesto ricotta mixture liberally over the top (you will have a lot of this mixture, don’t use it all on one piece of bread, just make more pizzas with it)
  7. Place desired amount of prepared shrimp over the top.
  8. Sprinkle grated Parmesan cheese over the top.
  9. Chop up some fresh flat leaf parsley and spinach leaves and throw onto the pizza.
  10. Add some crushed red pepper flakes if you desire a bit of heat.
  11. Drizzle Pizza with a bit more olive oil.
  12. Place pizza back in the preheated oven and cook an additional 3-4 minutes or until the edges look crispy and browned.
  13. Carefully remove pizza from the oven.
  14. Add fresh shaved Parmesan as a garnish if desired.
  15. Let sit a minute or two, then cut with a pizza cutter and serve! 
These will become a household favorite! 

I made a second one with the remaining shrimp scampi ingredients and made the other half a bruschetta and mozzarella pizza, so good! Get creative!

*If you want each piece of bread to have  crispy edges all around, cut your pieces prior to placing on pizza stone in step 2